User Management
CareLaunch lets administrators invite and manage the staff, providers, and administrators who work in your organization. This guide covers where to find user management, how to invite new users, how passwords are set and reset, and how to manage access over time.
Where to find it
User management lives under Settings → Users (Administration → Users). You'll only see it if you belong to a Platform Admin or Organization Admin group. Instance Admins do not have access to the Users page.
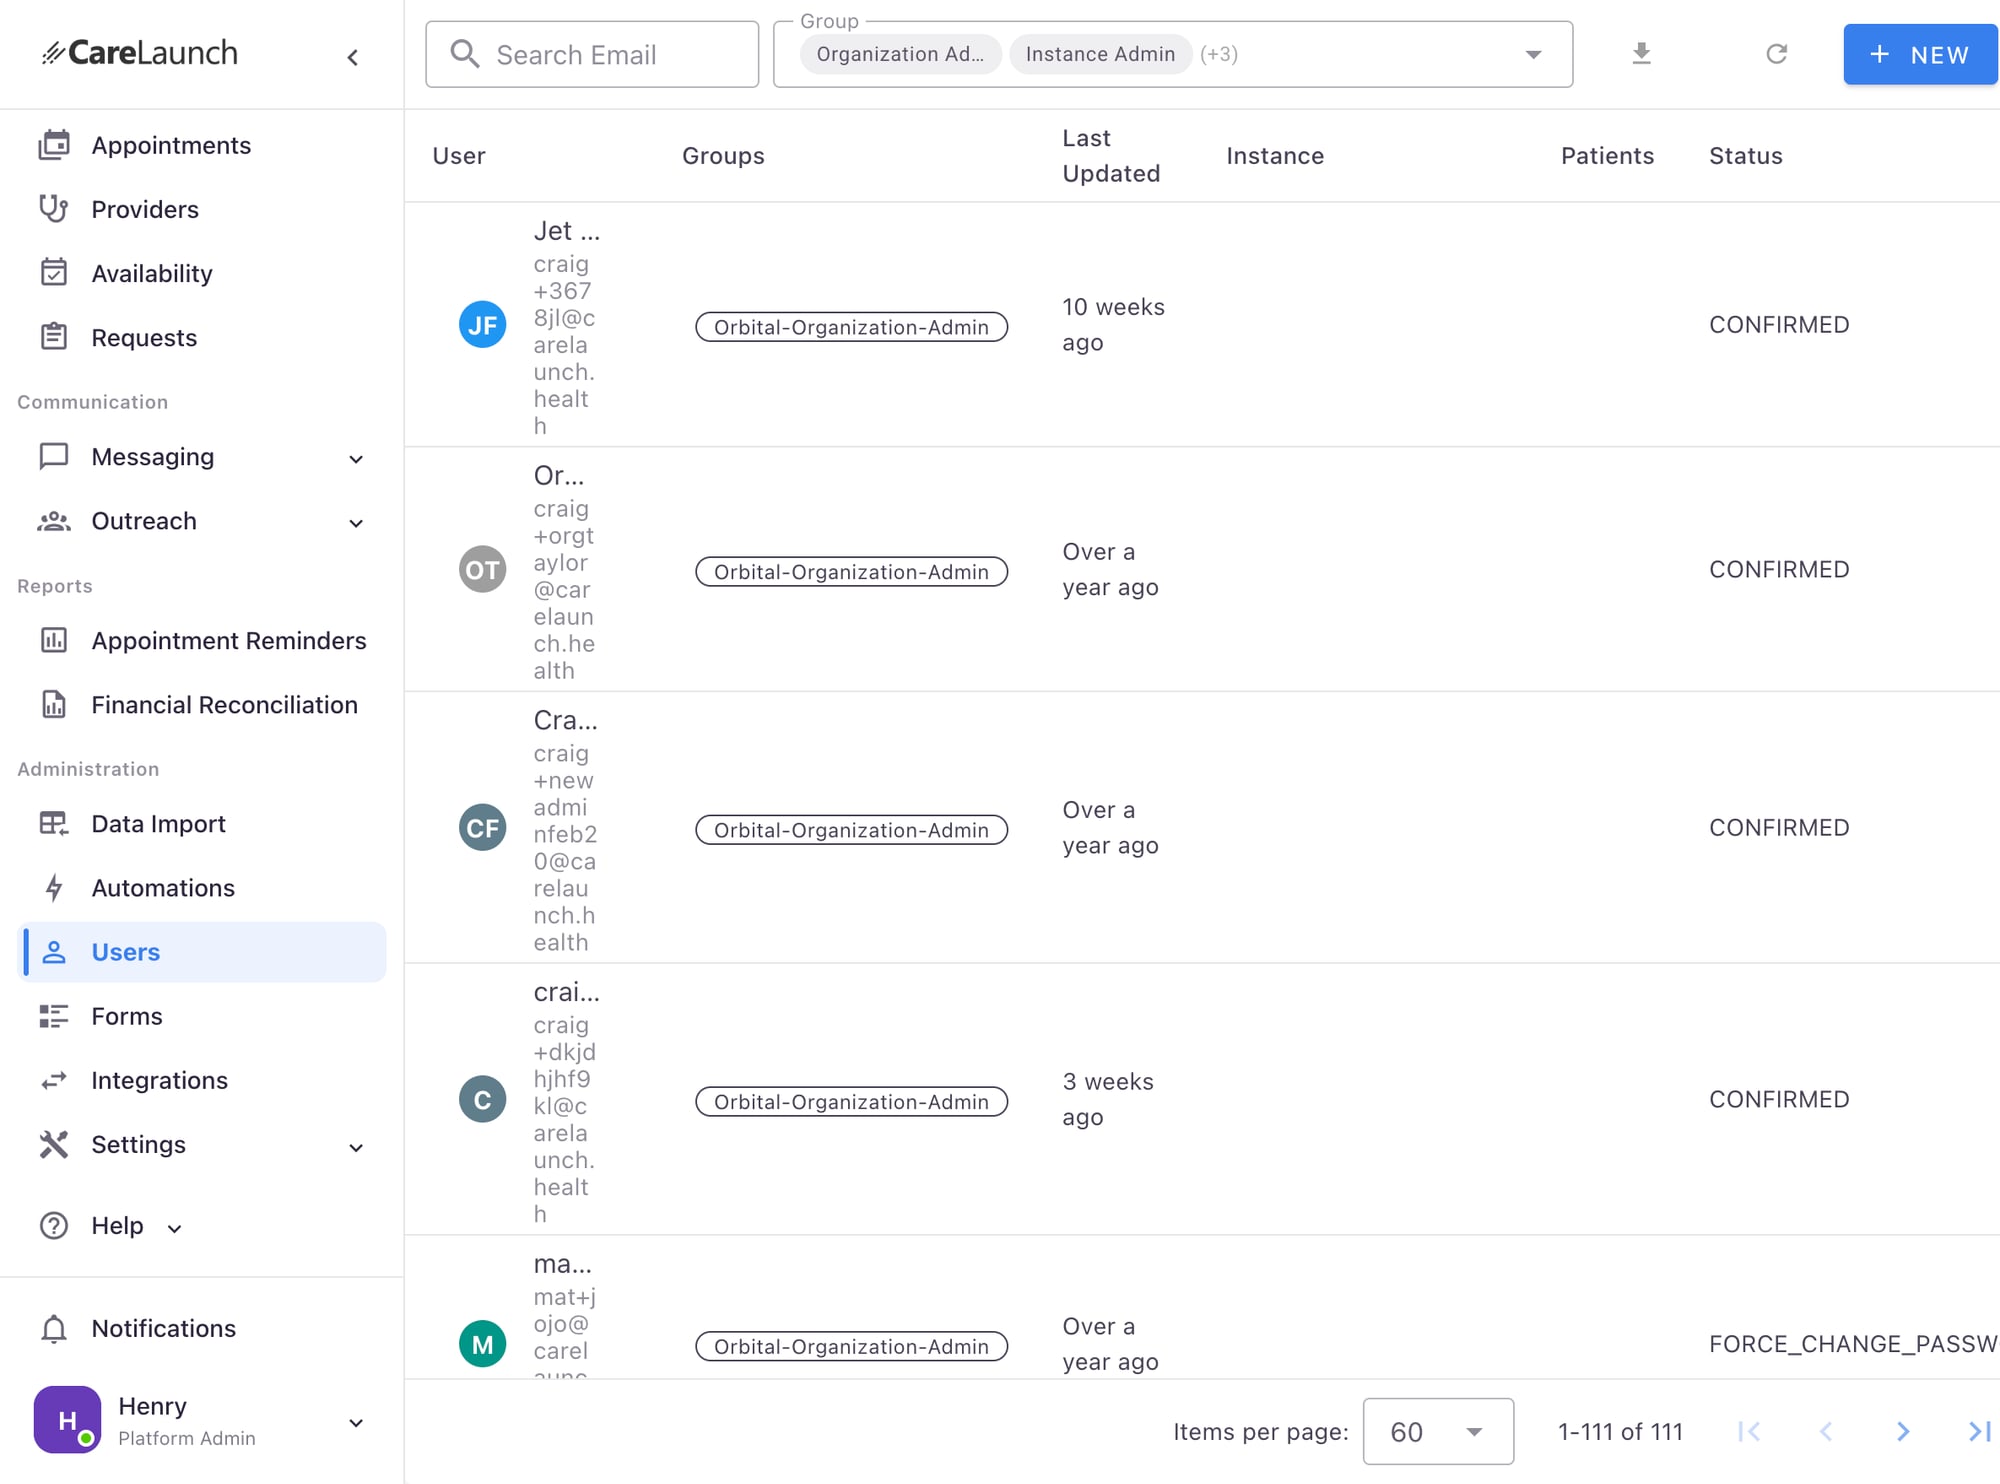
The Users page lists everyone in your organization with these columns:
| Column | Description |
|---|---|
| User | Name, email address, and assigned role chips |
| Last Updated | When the account was last modified |
| Last Login | When the user last signed in (Never if they haven't yet) |
| Instance | The organization instance the user belongs to |
| Account Status | The account's current status (e.g. Confirmed, Password reset required) |
| Active | An active/inactive toggle for administrators |
Use the Search Email box and the Group filter to narrow the list, the refresh icon to reload, and the download icon to export the current list to CSV.
Roles and permissions
Access is controlled by the groups (roles) assigned to each user. CareLaunch ships with a set of built-in administrator groups:
Organization Admin
- Full access across all instances in the organization
- Can create and manage instances
- Can invite and manage all users
- Access to billing and subscription settings
Instance Admin
- Full access within their assigned instance(s)
- Can manage users within their instance
- Can configure instance settings
- Cannot create new instances
Base Admin
A limited administrator role with fewer permissions than Organization Admin. The default Provider role that new organizations get is based on it.
Schedule Manager
Manages schedules and appointments.
AI Users
Grants access to AI features such as Concierge. Concierge also needs Platform Admin or Organization Admin, and it has to be turned on for the organization. See AI Concierge.
Platform Admin
Full access to features and settings, including campaigns and data import. The person who owns the organization has this role.
Beyond these, an account can be assigned care-delivery roles (for example a provider role) that grant access to clinical and coordination features. Each role appears as a selectable card on the user form with a short description of what it grants.
If your organization has the Custom Roles feature enabled, Platform Admins can define additional roles under Settings → Custom Roles and assign them to users like any other role. Assign the fewest roles a person needs to do their job.
Inviting a new user
Solo practices cannot add other users. New stays disabled, and the page says to upgrade to a group plan.
On other plans:
- Go to Settings → Users.
- Click New in the top right.
- Enter the user's details:
- Email Address — this is their login and cannot be changed later, so double-check it.
- Name — the user's full name.
- Phone Number (optional)
- Instance — the site the user will sign in on. Leave it as the current site if unsure. For a site with single sign-on that has its own sign-in, choose that site.
- Under Roles & Permissions, select one or more roles for the user.
- If you assign the Instance Admin role, make sure Instance is the site the user should administer.
- Click Save Changes.
CareLaunch emails the new user a temporary password. The user must change this password at first sign-in. While the password has not been changed, the account shows a Password reset required status. Once they've set their own password, the status changes to Confirmed.
Passwords
There are two ways a password can be set or reset: the user can reset it themselves, or an administrator can set one for them.
Self-service password reset (recommended)
Any user who is locked out or has forgotten their password can reset it from the sign-in screen:
- Go to your organization's sign-in page.
- Click Forgot password?.
- Enter the account email address. CareLaunch emails a verification code.
- Enter the code and choose a new password.
This is the preferred path — administrators never see or handle the user's password.
Administrator-set password
Administrators can set a password directly, which is useful when re-inviting a user or helping someone who can't receive email:
- Open the user from the Users list.
- Open the actions menu (⋮) in the top right and choose Change Password.
- Enter a new password. It must meet all of the strength requirements:
- At least 8 characters
- Contains a number
- Contains an uppercase letter
- Contains a lowercase letter
- Contains a special character
- Leave Make password permanent unchecked to require the user to choose their own password the next time they sign in (recommended). Check it only if the password should stay as-is.
- Click Submit and share the temporary password with the user through a secure channel.
When a password is temporary, the account shows the Force Change Password status until the user replaces it on their next login.
Managing existing users
Open any user from the Users list to view and edit their details.
Edit a user
Change the name, phone number, instance, or assigned roles, then click Save Changes. The email address (login) can't be changed after the account is created.
Activate or deactivate a user
Use the status toggle at the top of the user's details (or in the Active column of the list) to deactivate or reactivate an account. Deactivated users can't sign in, but their data is preserved. This is the safe alternative to deletion.
Actions menu (⋮)
The actions menu on the user's details page offers:
- Change Password — set a password for the user (see above)
- Modify Provider Association — change which Practitioner record is linked to this user (Platform Admin only)
- Migrate to Instance SSO — move a staff account that is linked to a provider record onto another site's Google single sign-on (Platform Admin only)
- Theme — set your own theme preference (shown only on your own user record)
- Clear Notifications — clear the user's notification badge
- Notifications — manage the user's notification preferences
- Delete — permanently remove the account (see below)
Delete a user
- Open the actions menu (⋮) and choose Delete.
- Confirm in the dialog.
⚠️ Deleting a user removes the account permanently. In most cases, deactivate the account instead so its history is preserved.
Linking a provider to a user account
A staff user's provider details live on a Practitioner (provider) record linked to their user account. CareLaunch links one for you:
- Inviting a user with New creates a Practitioner record for them and links it.
- Saving an existing user who has an administrator role links a Practitioner record if they don't have one, reusing a matching record or creating a new one.
To link the user to a different Practitioner record, a Platform Admin can open the user's details and choose ⋮ > Modify Provider Association. The provider record and its clinical data are not changed.
See Provider Management for details.
Security best practices
- Prefer self-service password reset so administrators never handle passwords directly.
- Assign the fewest roles a person needs (least privilege); use Instance Admin instead of Organization Admin where possible.
- Deactivate accounts promptly when staff leave, rather than sharing logins.
- Review the Last Login column periodically and investigate dormant admin accounts.
- Enable multi-factor authentication where available — see Multi-Factor Authentication.
Troubleshooting
The user didn't receive the invitation or reset email
- Ask them to check their spam/junk folder.
- Confirm the email address on the account is correct (open the user to verify).
- As an administrator, you can set a temporary password with Change Password and share it securely, then have the user change it on first login.
The user can't sign in
- Confirm the account status is Confirmed and the toggle is set to active.
- If the account shows Password reset required, the user needs to complete their first sign-in with the temporary password and set a new one.
- If the user was temporarily locked out after several wrong passwords, the lockout is applied by the sign-in service and clears on its own after a short wait. There is no Unlock action in CareLaunch. Ask the user to wait a few minutes, then try again or use Forgot password?.
- On a site with single sign-on, sign-in and lockouts are handled by your identity provider. Check the user's account there.
- If they've forgotten their password, direct them to Forgot password? on the sign-in screen.
The user is missing features or access
- Verify the correct roles are assigned under Roles & Permissions.
- For Instance Admins, confirm the correct Instance is selected.
- For providers, confirm the account is linked to a Practitioner record.
Related features
- Multi-Factor Authentication
- Single Sign-On (Beta)
- Security Overview
- Provider Management
- Instance Configuration
Last updated: July 2026