Automation Actions
Actions are the core building blocks that define what happens when an automation is triggered. This guide details all available actions and how to configure them effectively.
Setting Automation Actions
Once a trigger is established, the next step is to configure an action for automation. Actions can involve a range of activities or functions that will be executed when the automation is triggered and all filters are satisfied.
Action Types Overview
CareLaunch offers the following action types that can be configured in your automations:
Communication Actions
- Send Secure Message: Send encrypted messages through the platform's internal messaging system
- Send to Survey Monkey: Distribute surveys to patients
- Add to Campaign: Enroll patients in marketing or outreach campaigns
- Update Campaign: Modify campaign data for existing participants
- Remove from Segment: Remove patients from specific campaign segments
Task Management Actions
- Create Task: Generate new tasks for staff or providers
- Create Task - Connect: Create AWS Connect specific tasks
- Create Task - Zendesk: Generate Zendesk support tickets
Data Actions
- Create Resource: Generate any FHIR resource
- Assign Form: Assign forms to patients for completion
- Sync Integration - Incoming: Import data from external systems
- Sync Integration - Outgoing: Export data to external systems
Create Resource
The "Create Resource" action could be used to generate a corresponding observation within our application when for example a questionnaire response is created. Furthermore, it can be utilized to automatically generate service requests upon a patient's registration, offering a wide range of other possibilities. This versatile action streamlines various processes within our system, enhancing efficiency by automatically creating observations and service requests, among other potential use cases.
Create Task
A task typically refers to a specific action or assignment that needs to be carried out within your organization or system. Tasks are useful for various reasons, and they serve several purposes to include Dx/Tx reviews. Once you select the task creation action you will be able to refine the specific task depending on your selection.
Create Task - Connect
A Connect task is specific to AWS Connect.
Create Task - Zendesk
The process of generating Zendesk tickets is achieved by creating tasks. To ensure that the generated tasks are placed in the appropriate locations within Zendesk, it's essential to configure the following settings:
- Form ID: Specifies which Zendesk form template to use for the ticket
- Group ID: Determines which Zendesk support group the ticket will be assigned to
- Require Phone: When enabled, tickets will only be created if the patient has a phone number on file
- Flag Minor: Automatically adds "MINOR" prefix to ticket subjects for patients under 18
- Collect Responses: Enables storing ticket responses within the application
The system will also automatically:
- Add the patient's phone number to their Zendesk user profile
- Create a communication request in FHIR to track the ticket
- Add links to view the patient record in both systems
- Apply any organization-specific tags (e.g., "vso_outreach")
By configuring these settings appropriately, you can ensure tickets are created consistently and efficiently while maintaining proper patient context across systems.
Send to Survey Monkey
When choosing the "Send to Survey Monkey" action, it allows you to fine-tune the action and information that is sent to Survey Monkey. You have the capability to select the recipient, customize the message content, set the message subject, and choose the specific survey and collector, ensuring that the information is directed to the correct location within Survey Monkey. Additionally, you can specify a delay for when the action is executed and decide whether you want the responses to be stored within our application. This level of customization provides you with control over the survey distribution process, allowing you to tailor it to your specific needs and preferences.
Add to campaigns
The "Add to Campaigns" action is an advanced functionality designed to facilitate targeted campaigns, such as email campaigns, follow-ups, and reminders, among others. For instance, if your goal is to send a survey to every patient who has completed a case you can specify the action to identify the "CaseComplete" code. This way, the "Add to Campaigns" action empowers you to precisely define the criteria for campaign inclusion, allowing you to tailor your outreach to specific target groups or conditions effectively.
To effectively use this feature, there are several key steps to follow. Firstly, you need to specify the observation code within the application that will be synchronized with the campaigns.
After ensuring that the observation codes are correctly configured within the application, the next step is to get in touch with the CareLaunch team. They will assist in adding the necessary parameters to our backend systems, aligning the campaign settings with your specific requirements.
Update Campaigns
The "Update Campaigns" configuration operates in a manner very similar to the "Add to Campaigns" action, but with a specific focus on patients who have been updated with the observation code. Within the context of the same campaign, it is essential to configure the "Add to Campaigns" action in a manner that aligns precisely with the "Update Campaigns" action. This ensures that patients who are already present in the system but have been updated are correctly included in the campaign. By mirroring the configurations of both actions within the same campaign, you can guarantee that the outreach efforts encompass all relevant patients, whether they are new additions or individuals whose information has been updated. This approach maximizes the effectiveness of your campaign management.
Remove from Segment
Currently disabled
Send Secure Message
The "Send Secure Message" action is designed for sending encrypted messages through the application's internal messaging system. It can be configured to deliver messages to patients and can make use of predefined message templates. For instance, you can employ this feature to welcome each new patient upon their registration within the platform. This action streamlines the process of communicating with patients and allows for the consistent delivery of essential information and acknowledgments.
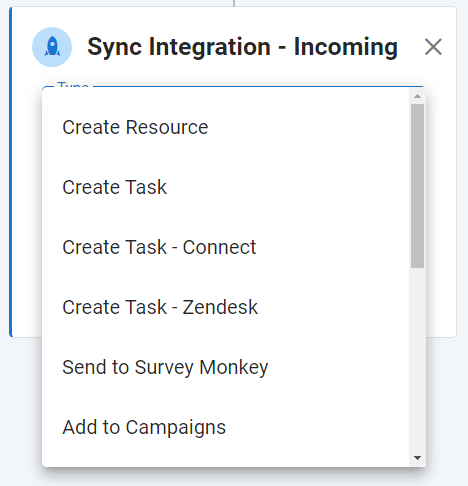
Sync Integration - Incoming
The "Incoming Sync Integration" action facilitates the triggering of a synchronization process that lets you define the source integration from which you want to sync data. You can also specify the destination instance where the information or patient records will be added. This action along with the "Sync Integration - Outgoing" empowers you to manage data flow between different systems and ensures that information is appropriately synchronized between the chosen sources and destinations.
Sync Integration - Outgoing
The "Outgoing Sync Integration" action initiates a synchronization process that enables you to designate the integration from which you want to send data and specify the target instance where the information or patient records will be sent from.
Send Email
Currently disabled
Assign form
Currently disabled